This section describes the field types you may encounter when entering or modifying data and what kind of data you can enter in the different field types.
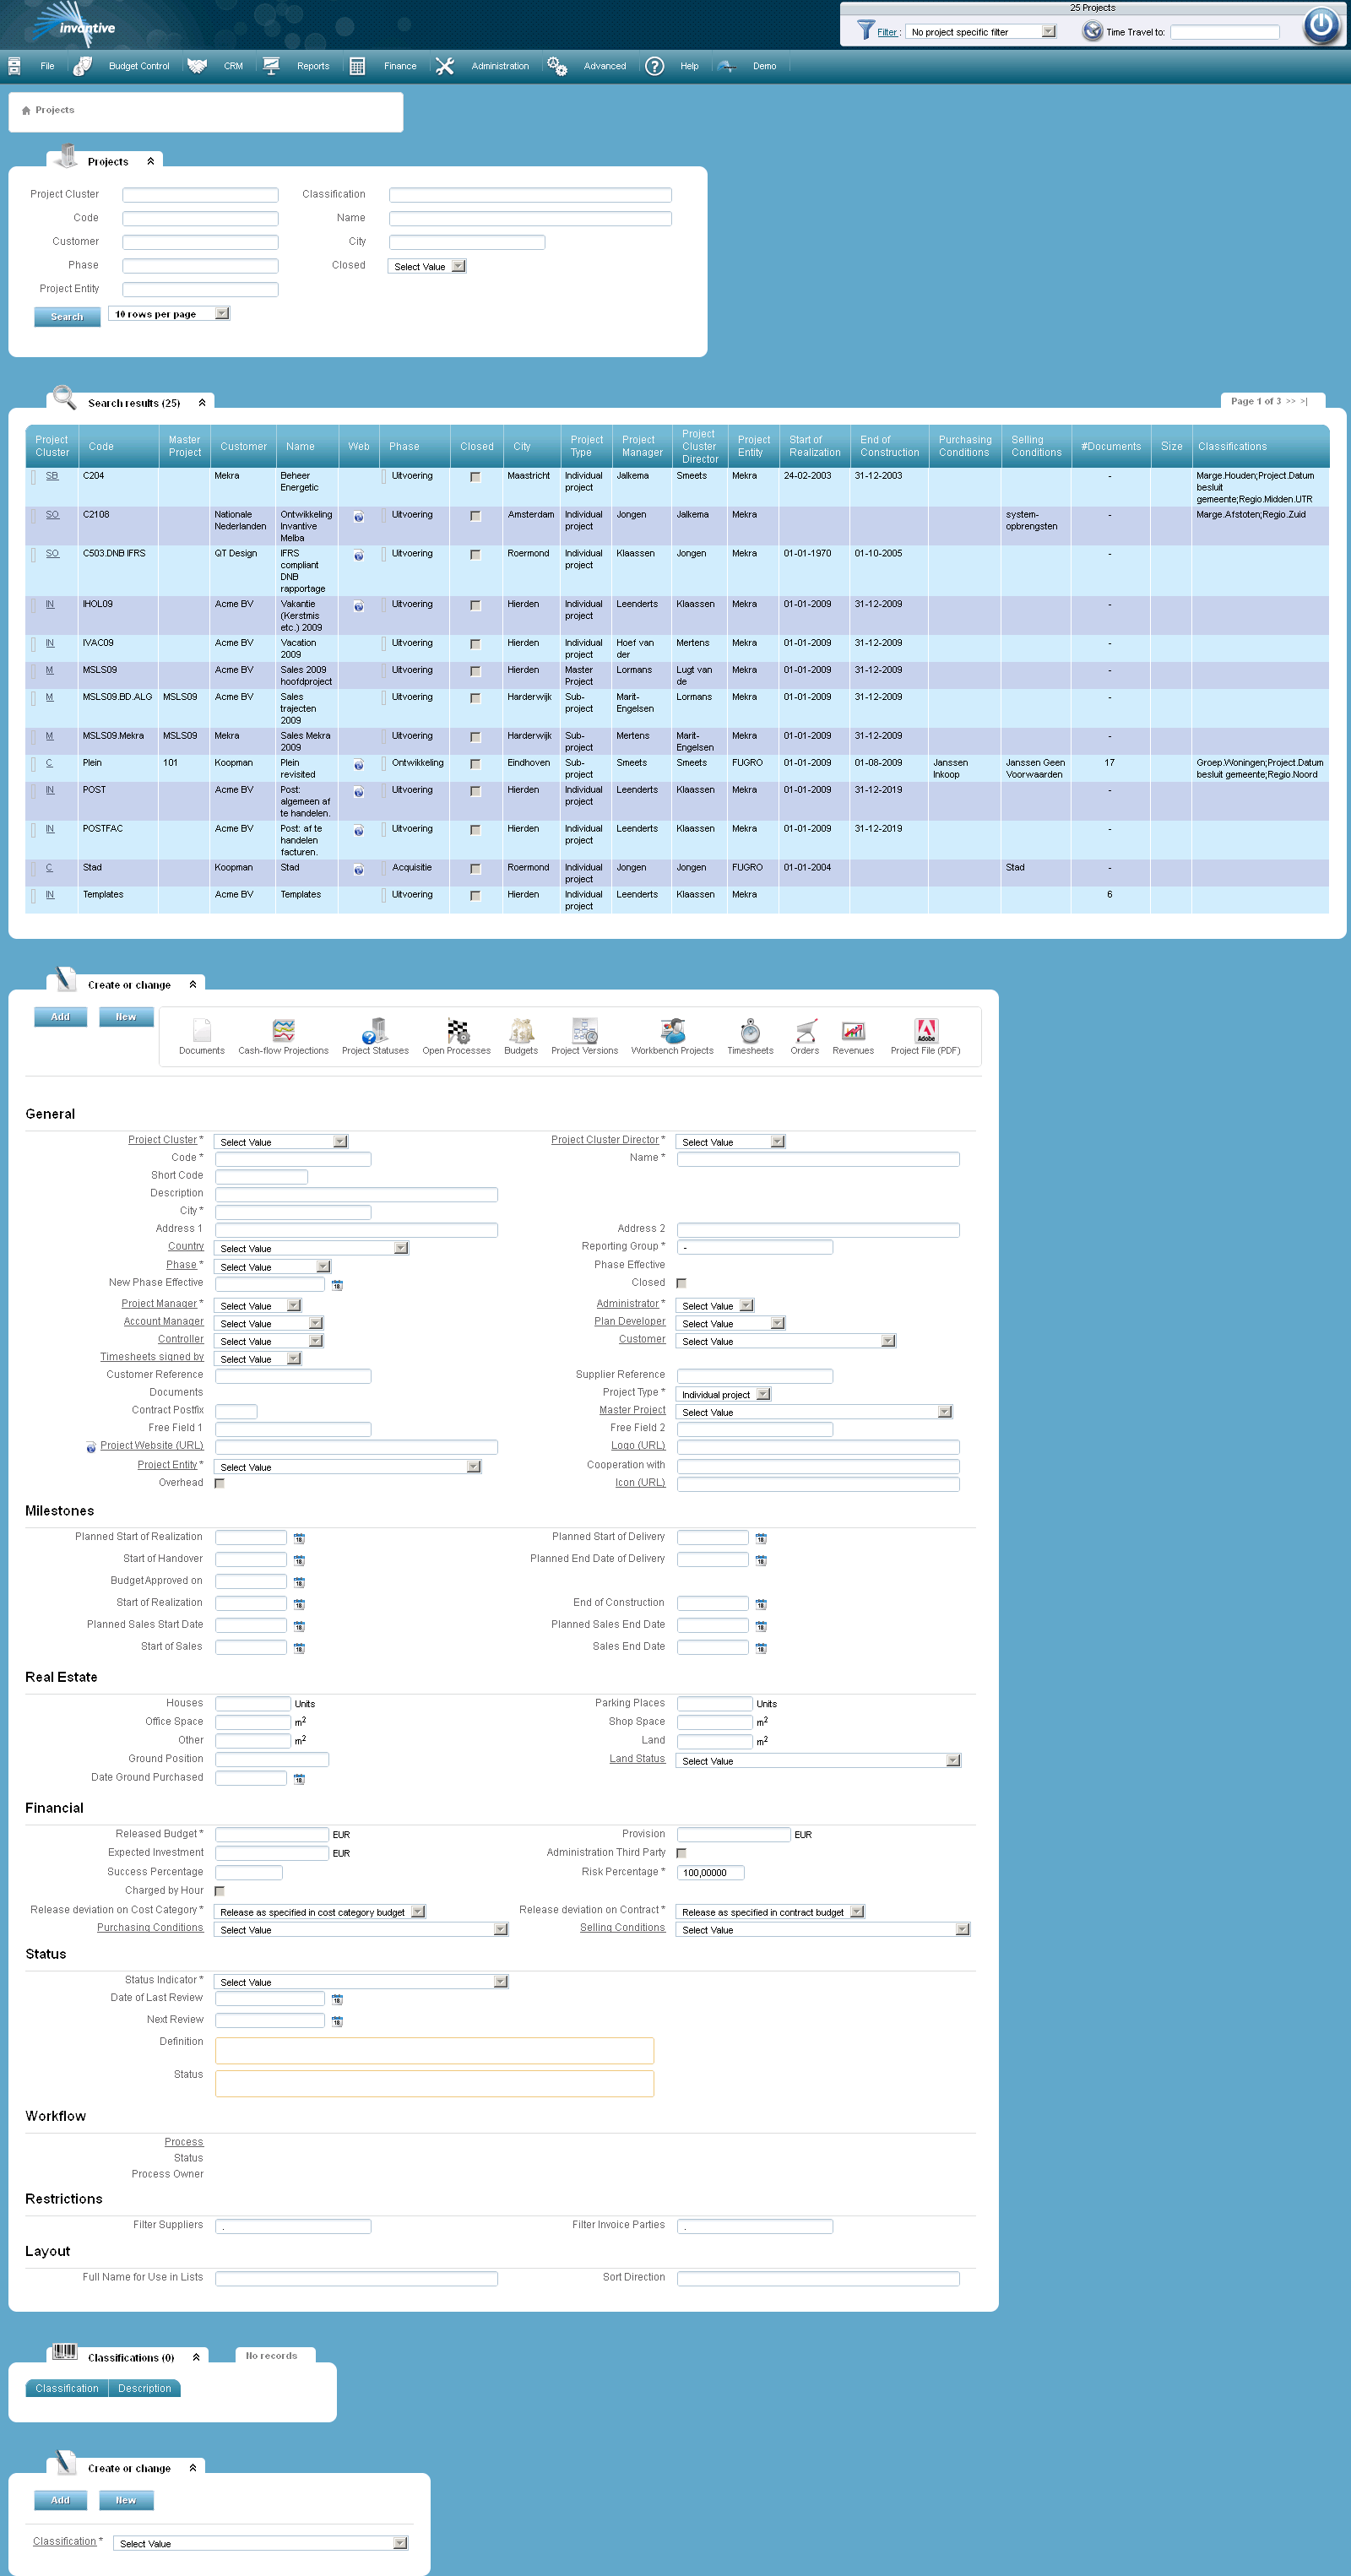
As an example let's see ‘Projects’.
Entry Fields
An example of an entry field is the white box next to ‘Code’. In a field like this you can enter a ‘free text’. This means you can choose - within certain boundaries - what you fill in. In the example of ‘Code’ you can enter the project code which is assigned by the administration. When you enter text into a ‘free text field’ it gets a red border.
Required fields
The fields that are marked with a ‘*’ are required. An example of such a field is the field 'City':

Amounts
All amounts are in Euros and will be written in the European way. This means that thousands are separated by a period and that the separation of whole and decimal numbers is shown by a comma. For instance: 123.456,78. If you use an American version of other software you have to pay attention to not change the way of writing numbers. The American way of noting numbers is the exact opposite of our way, for example 123,456.78.
If you enter a number with a decimal, you need to use the comma key (‘,‘). All points are considered thousands separators and are not looked at regardless of the place of the number. An input of ‘8.5’ is therefore treated as ‘85’.
The amounts you enter are left aligned. This means these can be found on the left side of the field. If the amounts are already entered, they are automatically right aligned. If you, for example, in the screen section, where you can search, enter a number you will see that the number is left aligned.
Percentages
Furthermore, there are fields where a percentage is requested (such as ‘Estimated Success Percentage’). You do not need to enter the percentage sign here.

Dates
When asked for a date (Example: ‘Expose Date’) then you are supposed to enter the date yourself. A date can be entered in multiple ways. Allowed input formats are:
•ddmm
•ddmmyy
•ddmmyyyy
•dd-mm-yyyy
•dd/mm/yyyy
•dd-mm-yy
•dd.mm.yy
•dd/mm/yy
The significance of the date format is as follows:
•‘dd’ indicates a two digit format of the day of the month from ‘01’ to ‘31’.
•‘mm’ indicates a two digit format of the month in the year where ‘01’ stands for January, ‘02’ stands for February .. etc..
•‘yy’ indicates a two digit notation of the year, for example ‘09’ stands for the year ‘2009’.
•‘yyyy’ indicates a four digit format of the year, for example ‘2009’.
You can also click on the calender icon next to the input field:

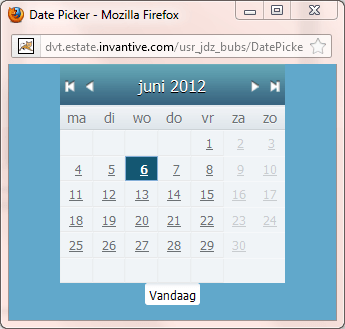
A calendar appears:

Select the day by clicking on one of the numbers in the calendar. If you select ‘today’ automatically the current date will be used. You can change the month by clicking on one of the two most inside white arrows - in the image below. The arrow to the right means a month forward. The arrow to the left means a month backward.

You can change the year by clicking on the two outer arrows. The arrow to the right means a year forward. The arrow to the left means a year backward.
If you want more than only change the day, you have to ensure that you change the day at the end. This is because after changing the day you will come back to the menu.
Times
When asked to enter a time, the following input formats can be used:
•hhmm
•hmm
•mm
•m
•h:mm
•h:m
•u.m
•h/m
In this case the abbreviation ‘mm’ is minutes and not months as in the date format, ‘uu’ stands for hours.
Date Time Fields
In date/time fields, first the date is entered and subsequently the time. The distinction between date and time is indicated by a space. The above given input formats show the way the date and time can be entered.
Drop Boxes
With drop boxes only valid choices can be made. If you hover above the drop box with the mouse pointer for a moment, you can see how many values are inside. A drop box functions as follows: the field next to ‘Stage’ in the example below, is a drop box. As shown a value already was selected: ‘Acquisition’.

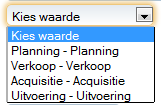
You can change the content of this drop box by clicking on the little square. This opens the drop box and it will get the shape of the following image:

Now you can choose five values, ‘Select value’, ‘Planning’, ‘Acquisition’, ‘Development’ and ‘Realization’. To choose you click on one of the possibilities. The drop box closes itself and your choice is recorded.
Check boxes
A final way to enter data in the screens is via check boxes. This is used when there are only two options: yes or no. If you check the box, you choose ‘yes’ and vice versa. An example of a check mark you can see in the image below:

The check is done by clicking on the white square or in the accompanying text or by selecting the white square with the cursor and then pressing the space bar. The field will look as follow:

 Invantive Estate