Follow these steps to configure the Oracle client:
•Construct (if not available yet) a tnsnames.ora configuration file.
•In a tnsnames.ora file (‘tns’ is the abbreviation for ‘Transparant Network Substrate’) all Oracle based databases (‘services’) and the route via the network to get there, are described.
•An example of a description of the service:
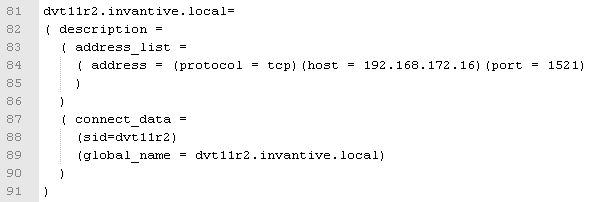
•This one describes that on the server with IP address 192.168.172.16 on port 1521 a program runs that knows how to make a connection with an Oracle database with the SID dvt11r2 and the global name dvt11r2.invantive.com.
•Full instructions on creating tnsnames.ora can be found in the Oracle documentation.
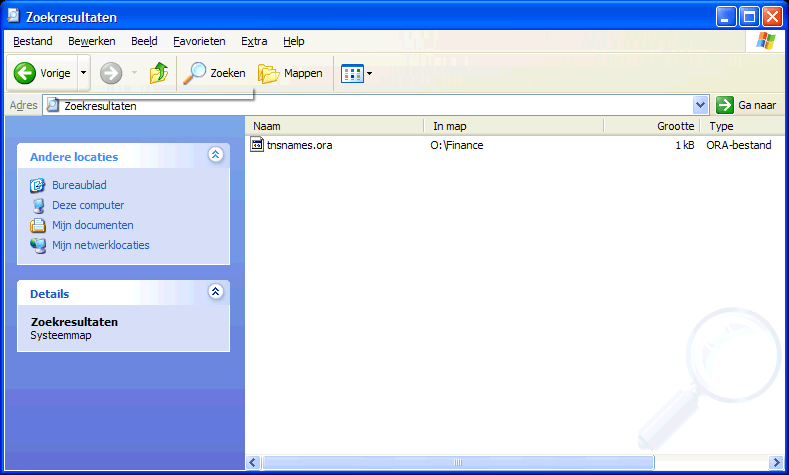
•Make sure that the tnsnames.ora file is located on the same place on all PC's, preferably in way to make it easy to add services from a central location. For fixed workplaces often a network drive is used, for example, as follows:
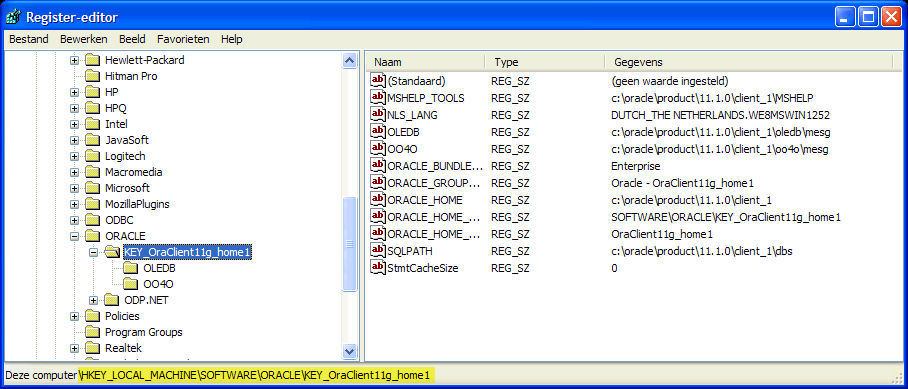
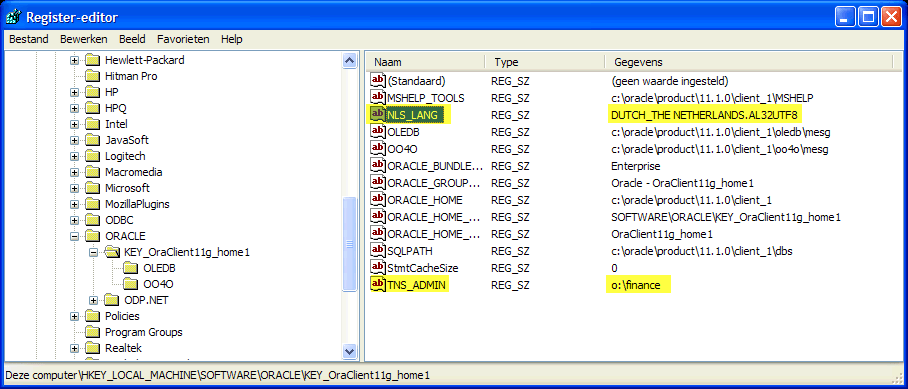
•Open the register with ‘regedit’ and go to the key HKLM\SOFTWARE\Oracle\KEY_OraClient11g_home1:
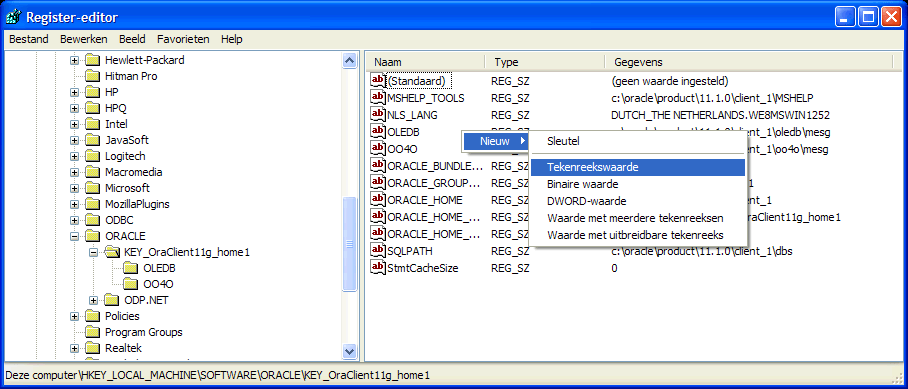
•Add a string with the name ‘TNS_ADMIN’ and make it point to the network location:
•Change also the NLS_LANG to ‘DUTCH_THE NETHERLANDS.AL32UTF8’ to make sure that messages appear in dutch and the Unicode character set is used. If you use Oracle Instant Client, then there is no NLS_LANG in the Windows registry; that's why you need to define the NLS_LANG environment variable in Windows.
•If you use Oracle Instant Client, then there is no NLS_LANG in the Windows registry; that's why you need to define the NLS_LANG environment variable in Windows.
•Test the connection from a command prompt with ‘tnsping’:

•It is still not certain if the user/password are correct, but it is certain that a network connection to the Oracle service can be built.
•Finally, check the connection by logging in with SQL*Plus.
 Invantive Estate